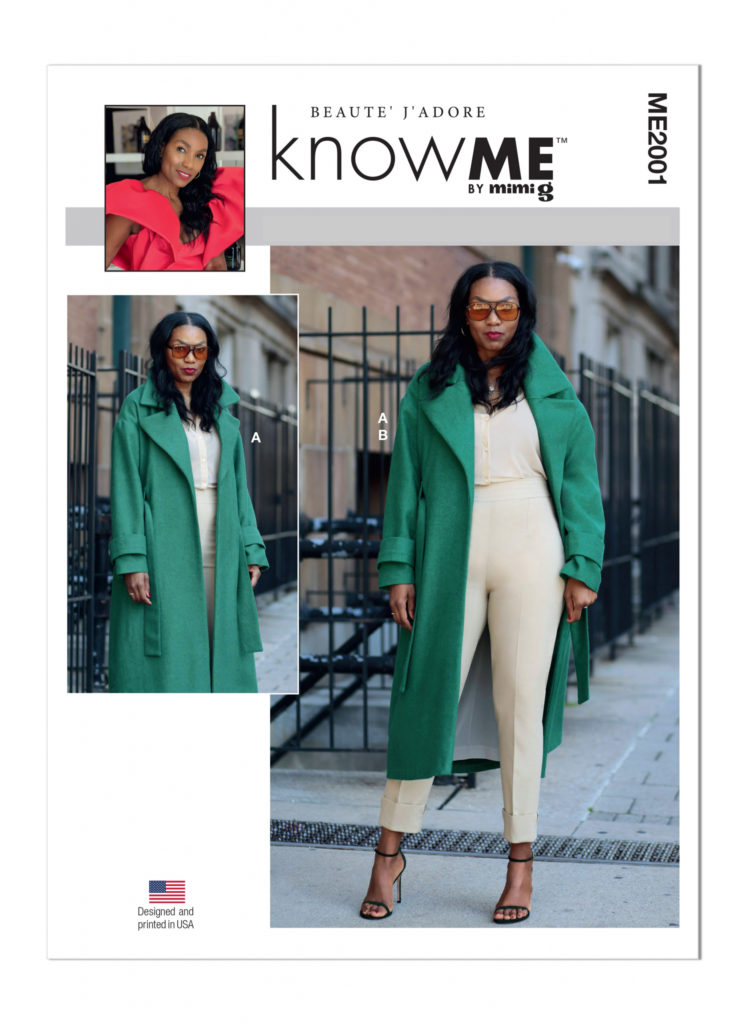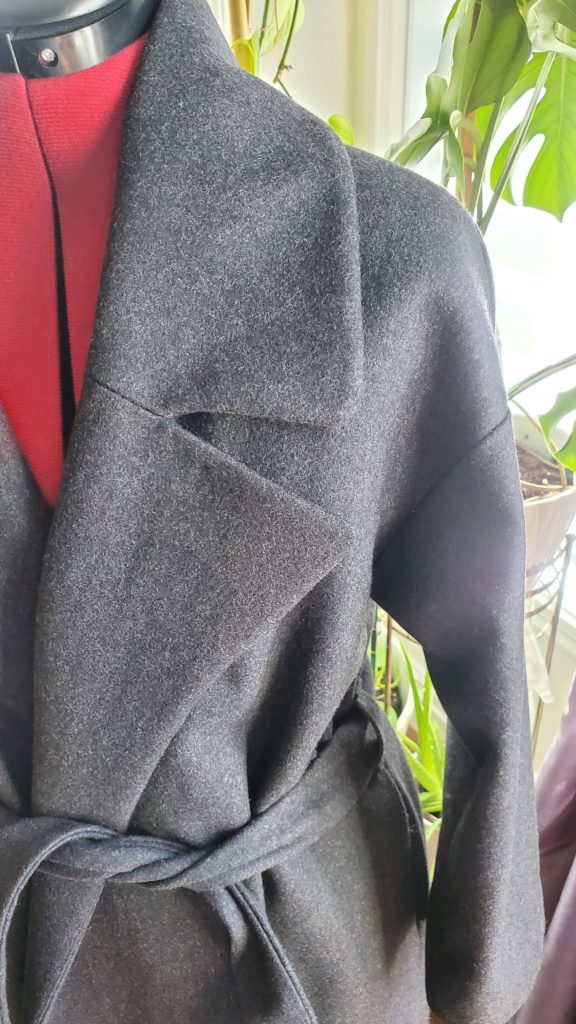
The inspiration for this project came from the pattern itself. I have a weakness for long belted coats in wool. I chose to sew this pattern using Westminster wool. It works perfectly with this pattern to make my next winter coat.

My new coat

Know Me ME2001
To begin with, since the coat is very loose-fitting, I measured the pattern to determine the size I was going to cut. I also compared one of my loose-fitting coats’ bust, waist, and hip measurements. I cut size 12 for the top of the coat and graded it to size 16 at the hips.

ME2001 view A
I then tried on the paper pattern to see what I needed to make adjustments to the shoulders. I slightly modified the curvature of the shoulder line to better suit my square shoulders. I also lengthened the sleeves by an inch, which is quite rare for me. I shortened the coat by a few inches to reach below the knee (43 inches long from the collar seam). So, I strongly recommend that you measure the pattern and compare it with your measurements or those of a coat of similar cut. I also moved the belt loops to the side seams. As a final modification, I widened the front pieces by 1 and 5/8 inch so that I could overlap the front panels of the coat.

Front coat extension
The project went well for the most part. I did run into a few difficulties with the thickness of the fabric in relation to my pattern. For example, the sleeve bands totaled 10 layers of fabric, which was far too thick. So I had to omit them. Had I chosen a thinner woolen fabric, I would have kept them, as they add an interesting element to the sleeves. The thickness of the wool also caused me problems at the neckline. Two sharp corners form the collar. Although I reduced the seam allowances and notched what was left, the collar points were not to my liking. I solved this problem by rounding off the collar points.

Rounded collar points
Altogether, I consider this pattern easy enough for an intermediate seamstress. The most technical aspect is sewing the under-collar and collar. Since the instructions are detailed and easy to follow, just take your time. If you need it, a tutorial for this pattern is available on YouTube. For the success of this project, I’d add the following tip: press all the seams as you go along. It’s the secret of sewing success.

Tailor’s ham and seam roll

Point presser and clapper
Here’s the basic supply list for this project:
Westminster wool in dark charcoal
Armo Weft medium-weight interfacing in black (for more body, I did two layers)
Gutermann thread in shades 102 for the lining and 120 for the coat

Know Me ME2001
Here are a few articles that were very useful in the realization of this project:
– Sleeve board
– Tailor’s ham and seam roll

Ready for Fall

Thank you Fabricville!
I like my new coat with all the modifications I’ve made to it. It’s right in line with this season’s trends.